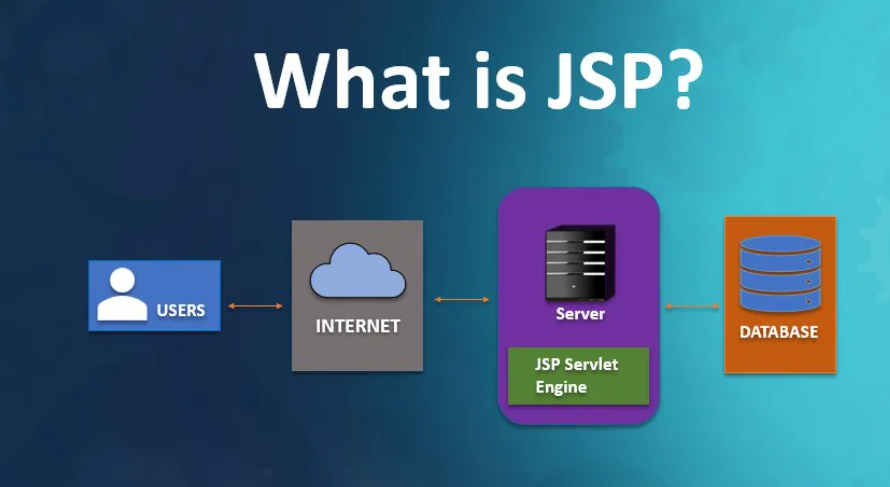
Developing a web application with Java Servlets and JSP (JavaServer Pages) is a classic approach for building dynamic web applications using the Java programming language. Servlets handle the server-side logic, while JSP enables the creation of dynamic web pages. Here’s an overview of the steps involved in developing a web application with Java Servlets and JSP:
- Set up the Development Environment:
Install Java Development Kit (JDK) and an Integrated Development Environment (IDE) such as Eclipse, IntelliJ IDEA, or NetBeans. - Create a New Java Servlet:
Create a new Java servlet by extending thejavax.servlet.http.HttpServletclass. Override thedoGetordoPostmethod to handle HTTP requests and implement the required business logic. - Configure the Deployment Descriptor:
Create a deployment descriptor file calledweb.xmlto configure the servlet mappings, URL patterns, and other application settings. Specify the servlet class and URL mappings in theweb.xmlfile. - Create JSP Files:
Create JSP files to define the web pages and dynamic content of your application. JSP files contain a mixture of HTML and Java code. Use JSP tags and expressions to embed Java code within the HTML markup. - Implement Servlet-JSP Interaction:
Within the servlet, forward or redirect requests to the appropriate JSP file using theRequestDispatcherclass. Pass data between the servlet and JSP using request attributes or session attributes. - Handle Form Submissions:
Implement form handling in servlets by extracting form data from the request parameters. Perform necessary validation and processing, and then display the appropriate response using JSP. - Work with Databases:
If your application requires database interaction, use Java Database Connectivity (JDBC) to connect to a database, execute SQL queries, and retrieve or update data. Properly handle database connections, prepared statements, and result sets. - Handle Sessions and Cookies:
Implement session management using theHttpSessionobject to store session data and track user sessions across multiple requests. Use cookies to store user-specific information on the client side. - Implement Authentication and Authorization:
Add authentication and authorization features to your web application by implementing user login, user roles, and access control mechanisms. You can use a combination of servlet filters, session management, and database integration to achieve this. - Test the Web Application:
Write unit tests to verify the functionality of your servlets and JSP pages. Use testing frameworks like JUnit or TestNG to test different scenarios and ensure the application behaves as expected. - Deploy the Web Application:
Build the web application into a deployable WAR (Web Archive) file. Deploy the WAR file to a servlet container or application server such as Apache Tomcat, Jetty, or WildFly. - Monitor and Maintain the Application:
Monitor the application’s performance, handle errors, and perform regular maintenance tasks. Consider using logging frameworks like Log4j or SLF4J to track application events and troubleshoot issues.
By following these steps, you can develop a web application using Java Servlets and JSP. However, note that this is a traditional approach, and nowadays, many developers prefer using modern frameworks like Spring MVC, JavaServer Faces (JSF), or Spring Boot for building web applications in Java, as they provide additional features and productivity enhancements.