Introduction:
In This article, we’ll show you how to create a chatbot using OpenAI python. OpenAI is an artificial intelligence research organization that provides a platform for building and training machine learning models. ChatGPT is one of the most popular Ai Models which can be used to generate text on the prompt.
Requirements:
To make this ChatGPT chatbot using python, make sure that you have the following:
- Python 3.x installed on your computer
- A text editor or IDE
- An OpenAI API key. You can sign up for a free API key on the OpenAI website
Find the OpenAI API key here: https://platform.openai.com/account/api-keys
Required Modules:
Firstly we have to install ‘openai’ Library using python also we need a ‘tkinter’ library.
To install the libraries, open a terminal or command prompt and run the following command:
pip install openai
Code Implementation:
After the installation of modules, we need to import the required modules into the program. along with that, we need an OpenAI key.
					import openai

# Apply the API Key
openai.api_key = "YOUR_API_KEY"
Now we’re creating a function to generate a response from OpenAI GPT-3 Model.
					# Generate a response using OpenAI GPT-3
def generate_response(prompt):
    completions = openai.Completion.create(
        engine="text-davinci-002",
        prompt=prompt,
        max_tokens=1024,
        n=1,
        stop=None,
        temperature=0.5,
    )

    message = completions.choices[0].text
    return message
The generate_response the function used to take an input and returns a response generated by the OpenAI GPT-3 model. The openai.Completion.create method is used to generate the response.
Next, we’ll write a function to display the response in a GUI interface
					# GUI interface
def display_response():
    input_text = input_field.get()
    response = generate_response(input_text)
    output_field.config(state='normal')
    output_field.delete(1.0, tk.END)
    output_field.insert(tk.END, response)
    output_field.config(state='disabled')
tkinter library is used to create the GUI interface. the window is created using the tk.Tk() method and named as root. The root.title method use to sets the title of the window, and the root.geometry method sets the size (width, height) of the window.tk.Entry method use to create input, and a submit button is created using the tk.Button method. The command parameter of the tk.Button the method is set to, which is the function that retrieves the input text and displays the response.An output field is created using the tk.Text method. The state='disabled' parameter makes the output field read-only.Finally, the root.mainloop() method starts the main loop of the GUI interface.Source Code:
					import tkinter as tk
import openai


# Apply the API Key
openai.api_key = "YOUR_API_KEY"

# Generate a response using OpenAI GPT-3
def generate_response(prompt):
    completions = openai.Completion.create(
        engine="text-davinci-002",
        prompt=prompt,
        max_tokens=1024,
        n=1,
        stop=None,
        temperature=0.5,
    )

    message = completions.choices[0].text
    return message

# GUI interface
def display_response():
    input_text = input_field.get()
    response = generate_response(input_text)
    output_field.config(state='normal')
    output_field.delete(1.0, tk.END)
    output_field.insert(tk.END, response)
    output_field.config(state='disabled')

# Create the main window
root = tk.Tk()
root.title("OpenAI Chatbot")
root.geometry("600x700")

# Create the input field
input_field = tk.Entry(root, font=("Arial", 14))
input_field.pack(pady=10)

# Create the submit button
submit_button = tk.Button(root, text="Submit", font=("Arial", 14), command=display_response)
submit_button.pack(pady=10)

# Create the output field
output_field = tk.Text(root, font=("Arial", 14), state='disabled')
output_field.pack(pady=10)

# Start the GUI event loop
root.mainloop()
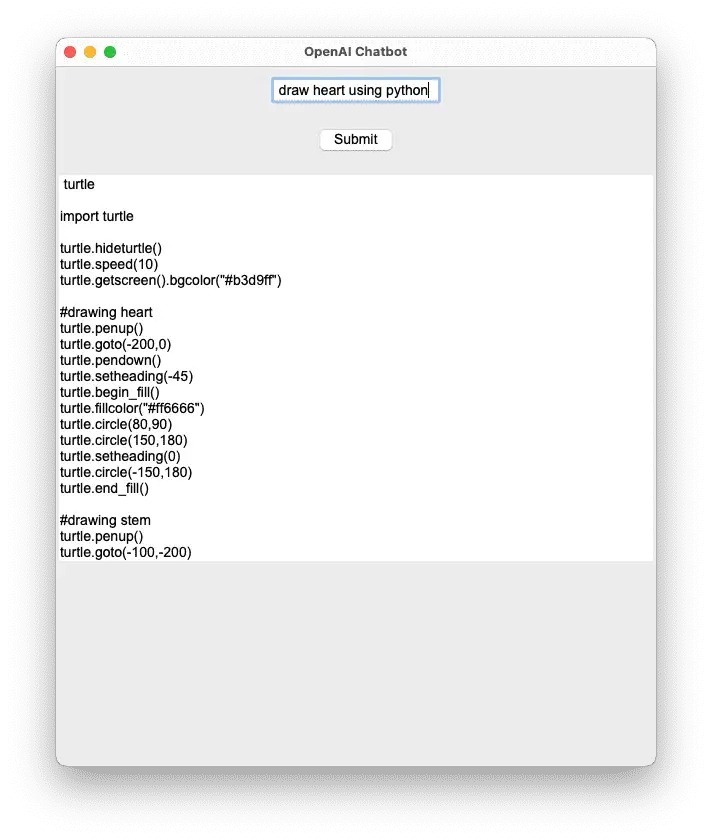
Output: